Sunday, October 28, 2012

It's A Dead Man's Party!

What fun thing did I do in SoCal today?

I hit the Day of the Dead celebration at Rose Hills Memorial Park!


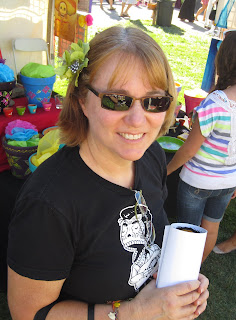
That's me in front in the MisNopales Elvis t-shirt ;
before going I had a lefty white lady moment of
I don't want to be culturally insensitive and/or look like I'm trying too hard!
So I ditched my sugar skull skirt and went with MisNopales,
which ended up being just right.

Just as promised, there were altars there...


...including this one in a cool car!


There was a sugar skull as big as I am!


Okay, it wasn't actually made of sugar.
But wouldn't it have been awesome if it was?

The non-profit Donate Life/ Done Vida had a big presence at the celebration.
 I thought this was cool not only because the message about organ donation
dovetailed nicely with the whole theme of Day of the Dead,
but also because my own Pa is alive and kicking today because he is an heart donor recipient.


This is the Jardin (Garden) of Donors, which had photos and quotes from donors, bless 'em.

I also saw Catrinas...


... which both the Sweet Man and I copped a pose nearby.


There were food trucks; 
when riding the shuttle to the location,
a woman and I shared a nice moment when she caught sight of them and gasped,
"Oh, look!  Food trucks!"  And I replied with "Yay!  Food trucks!"  
Then we both laughed with glee,
because who doesn't love greasy/sweet/spicy food from a food truck?


Sadly, these are not my tacos.  We tried to get sweet potato fries with toppings,
and they ran out of the toppings right as we finally got to the front of the line!  Boo!

But, hurrah!
 Craft booths!


I love me some good craft booths.

I bought a new green skully flower for my hair.


Now, what's that in my hand?

Why, the best thing of all!

Lalo Alcaraz, who does the comic strip La Cucaracha,
was selling signed prints!


Woo!  I was so freakin' excited!
I love Charlie Brown,
I love Day of the Dead,
so it's like he made these 

just 

for

MEEEEEE!!!

There was also dancing and singing performances,
but the Sweet Man and I headed out to do some personal Day of the Dead business:
visit my grandparents.


They're both buried there, but since it's over an hour from my house to Rose Hills,
the last time I was there was when Grandpa was buried in 1993.

A big part of Day of the Dead
is cleaning and decorating the gravestones of friends and family,
and I came prepared.

Props to the Sweet Man for helping me find the gravestones;
although I had the area and number, it was still a scavenger hunt.
He had the good idea of using his smartphone to type in nearby names on gravestones,
so we were able to triangulate how close we were.

The gravestones weren't in too bad of shape,
but I clipped the grass around them, wiped them off with a soapy cloth...


... and put some flowers on them from my garden.


Then the Sweet Man and I enjoyed some flan we'd bought from a food truck (yay!)
 as a little picnic.


Picnics in the cemetery are actually part of the Day of the Dead celebration,
and this particular dessert had a nice tie-in to my grandma:
she died when I was just eight, so I don't have a lot of memories of her.

But!

One memory that I do have is of her giving me a spoonful of sweetened condensed milk
when she was baking with it.

And what's the very first ingredient of the flan we enjoyed on this fine, sunny day?

Sweetened condensed milk!


It was like a little hello from Grandma.


Saturday, October 27, 2012

Down The Pinterest Rabbit Hole

I've written about Pinterest before,  and since it's my new crazy-obsession,
I thought I'd scour its archives for hours at a time
efficiently find an idea or two for the goody bags I was making for some friends.

Let's see what I put together, shall we?

I started with these wee mummy pumpkins:


They were fast and easy to make with my modifications;
you can check out this entry to see how to do them.


Next, I made these super-cute little jack-o-lantern "seeds", 
which are just orange Tic Tacs in their original container with an added Halloween label:


Here's the original Pin complete with a printable label;
the Sweet Man blanched at all that black ink required, so I made my own with this graphic.

Also, I thought the black kitty was a nice shout-out to my own dear Jackie-Cat,


Next!  Spooky eyes!


Now, for the original Pin,
the crafter said she fed Christmas lights through the toilet paper rolls.
The pin I saw said to use glow sticks. (They're tied with the purple ribbon to the TP roll.)

Also, I would try out one or two before committing to making a bunch.
I was at a Trunk or Treat last night and my neighbor, (a sister Pinterest addict aficionado)
was having trouble getting these to sit right.

And if you decide to give some?
 You might want to make directions like I did, and cover the TP roll with black paper. 
Getting a regular TP roll in gift bag could be kinda weird.


To the pattern!

Shiny Happy World has all kinds of patterns, including some for free.
I included this elegant witchy embroidery pattern in a nice big envelope.


Here's the original Pin; she has other Halloweeny stuff there, too.


Here's something fun and easy:  spiral ghosts!


They look like a snail when flat, but when you string them up?
They spin and move in a very satisfying way:


It was hard to get a picture of these guys, since they really move in the wind.

The original Pin said to use poster board,
but the Sweet Man had some vellum to share.  It was nicely translucent for these ghosts.


For both the witch and the ghost, I used some big envelopes I snagged from the staff lounge
(teachers are always doing stash purges),
and stickers I bought from a favorite Etsy shop of mine, waddlinonion.


When it came time to bag all these up, I knew exactly what I was going to use.
Check out this freakin' adorable witchy goody bag!


Don't you just loooove it?  I know I do.
The original crafter didn't have a pattern, but it was pretty easy to figure out.

If you're making some of your own, here's some tips:

1) A standard bag is 6 inches across, so two rows of lace will require a foot per bag.

2) After I punched the holes in the stockings, I backed them with crepe paper to make the purple polka dots.  The crepe paper was forgiving, and easy to glue.

3)  I didn't have big letter stamps for the "Eeek!",
so I made my own with some DIY stamp stuff I had stuck on the end of a wooden dowel.


According to Pinterest, if you don't have the DIY stamp stuff you can use craft foam.

Let me just say, the original crafter? 
Made over SIXTY of these bags for her kids' classrooms.
Kudos to you, Crafty Lady.  

KU-DOS.

They weren't too difficult, but they did take a bit of time.


So, how does everything look, all together?


Pretty amazing, if I do say so!


Interested in more Halloween ideas?
Check out my Halloween and Day of the Dead board on Pinterest!


Saturday, October 20, 2012

All Wrapped Up In Halloween

While mainlining my drug of choice, Pinterest, I saw this cool little pumpkin:


Oh, yeah, I thought, Totally doing it.

The instructions, however, were a bit supply-intensive.
So I decided to see if I could make these (admittedly, not super-hard) mummy pumpkins
an even easier project.

And I did!

All it took was this stick-to-itself wrap from Target...


... and some itty bitty pumpkins from Trader Joes.


I just wrapped those pumpkins with the gauzy wrap,
stuck a couple googly-eyes on with a glue stick,
then put a couple more pieces of gauze partway over the googly eyes.


I could probably poke a little mouth made out of black cardstock under the wrap,
but even if I took that extra step,
the whole process would take less than five non-messy minutes.

What do you think?
An easy project for kids, the time-constrained, and craft-challenged adults, right?

Wednesday, October 17, 2012

It's Beginning To Look A Lot Like Halloweeeeen!

The Jolly Sister celebrated her 50th birthday this past weekend!

Since she has an October birthday (as do I),
I thought a Halloween-related gift would be nice.

I saw these cool personalized pumpkins at Aaron Brothers...


... but they were pretty pricey.

And since I am the self-proclaimed Queen of Halloween...


... I knew I could figure out how to do the pumpkin myself.

Although I could have used a real pumpkin, I decided to go the Funkin route.

Btw, the Sweet Man had never heard of  "Funkins" before,
and decided that it sounded more like a disease than an artificial Halloween gourd.


Seriously, y'all, wear your flip-flops in the shower.  You don't want a case of Funkins.

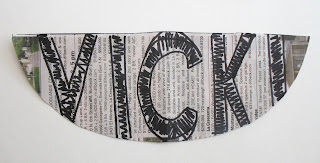
I used newspaper for my template; it's floppier than regular paper,
and molds better to the pumpkin.

I cut out a smile, and fit the letters of the Jolly Sister's name into it.


Once I was happy with the smile,
 I taped it and triangle eyes and a nose to the pumpkin.


The latest batch of pumpkin carving patterns included this nifty tool...


... which made it easy to mark the lines through the paper.

Aaaaand, it wasn't until I found the Aaron Brothers photo above that I realized
I had switched up the carving area.

The ones I had seen removed the area around the letters,
I removed the letters themselves.

So if you're going to do one of these,
decide beforehand what you're removing and mark accordingly.

Anyhoo, I started cutting.  
I thought I could just used the tools from my regular pumpkin carving,
but that styrofoam was too tough. 

Instead, I settled on scoring/starting the lines with a craft knife,
and then using one of the heavier duty carving tools.


(The green carving tool came from the Pumpkin Masters "kid-friendly" carving set.)

Protip!  If you haven't carved one of these fancy pumpkins before,
make sure carve out the letters a section at a time. 
If you try to do it in one piece, you might have crucial bits crack off.


After I was done, I realized the letters didn't look "smiley" enough.
I now realize, duh, that's it's because I cut out the letters instead of the grin.

But, bygones!!

 I handled it by carving a little triangle at the corner of the smile,
to give it more definition.


Time to light 'er up!

Now, you CANNOT use a real candle in these, y'all.

I found a strobe light with the Halloween stuff at Target...


...and it fit perfectly.


Once done, I set the Funkin among its gourdy brethren...


... and was pleased with the results.

And there you go!

A fun gift for those with October birthdays,
or a cool decorating idea for a Halloween wedding,
or a neat photo prop for a family photo.

So, get carving!


Saturday, October 13, 2012

Treat Yo Self 2012!

Guess what I got for my birthday?

A "Treat Yo Self" mug!


You can get one of your own from PeachyApricot on Etsy.


Also, my talented husband made me a Harry Potter tatebanko!


It's hard to appreciate its awesomeness in this picture; 
the glass reflects when I try to take a photo.

But it's super-cool:  it's 3-D and has all the major Harry Potter characters.
If you look at his shop, you can see other tatebankos he's done.
I really like the photobomb one he did of the moon landing:


Wouldn't that be a nifty gift for a kid?
Or a proud member of the Tribe of Nerd?
Or anyone, really?

Also, Minnie's brother, Jackie, wants to know why this blog isn't called
"Dang It, Jack!"


Sorry, Jackie.  You're a super-cool kitty,
but you're not the determined photobomber that Minnie is.