I've got a weird kitchen: it has a fair amount of floor space, but a sucky amount of storage.
Here's what might be on my counter on an average day:

So the Girl and I decided to make an island!
After kicking around Pinterest, I remembered that a blogger had made some very cool shelves out of boring old crates from the craft store.

Fancy!
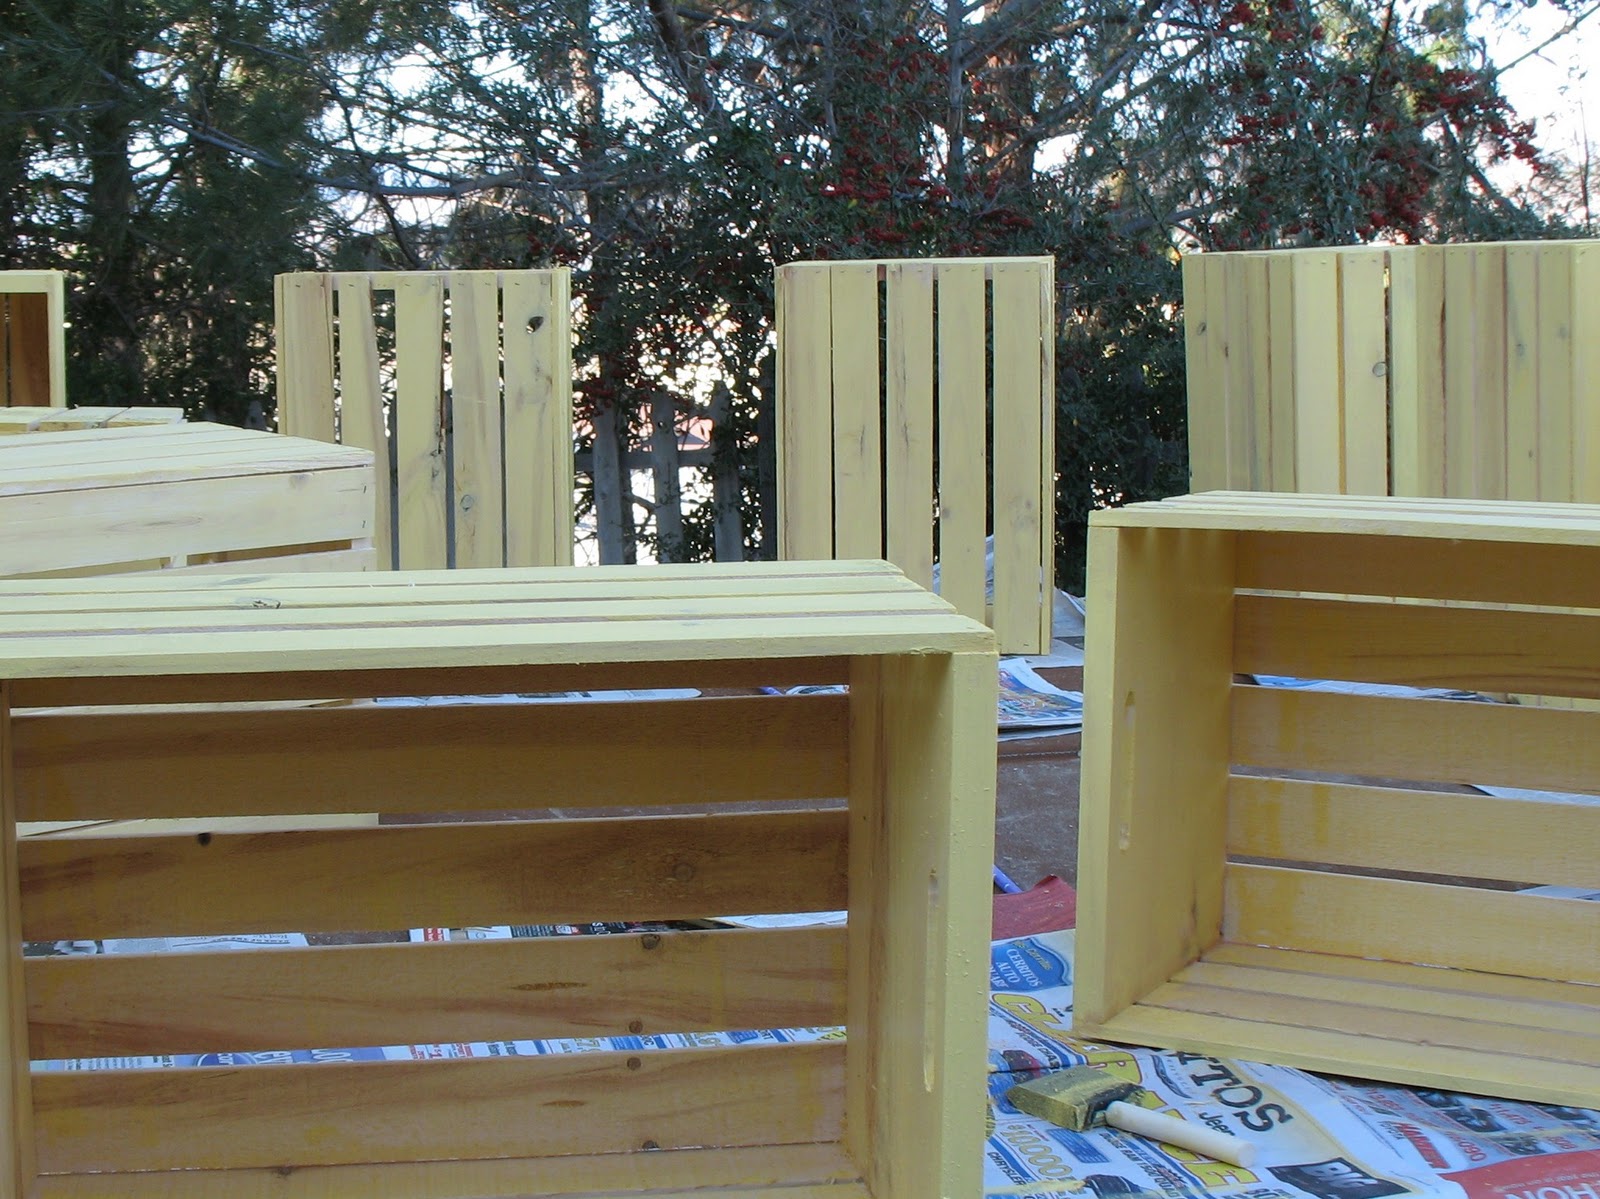
I took myself to Michaels, bought a dozen crates at ten dollars apiece,
and got some stain from Home Depot.

The blogger recommended a clear tint, but I accidentally got white. This was fortuitous, because I think the clear would have been too light. I chose something called golden/sunflower/meadow ...I don't really remember. But it was yellow.
The Girl and I stacked those suckers out on the old Jacuzzi, and got to work.

As you can see, we didn't work terribly hard on getting the paint job perfect. We were going for rustic/funky. (Also known as, too lazy to get all the crevices.)
After they were dry, we took them inside and realized, Whoa! Stacking these guys
three-high would mean we'd be using mixing bowls chin-high! Two-high would mean we'd have to squat, but a combo of landscape and portrait crates was juuuust right.
But how to keep the whole thing together?
Cable ties!

I picked up some eight inch ones at Home Depot, and the Girl and I just started attaching the crates to one another until the whole thing felt sturdy.
But I wanted to be able to move the whole island around, so I got a single piece of wood for the bottom and optimistically started sawing away with this little blade:

Oy.
The Girl and I hacked away in shifts, then we called in the Boy. He didn't make much progress, either, so we brought the heavy guns.
Who remembered we actually had an electric means to get through
this chunk of particle board.

I flipped the whole thing over and attached four casters.

Flipped it back, scored and cut a piece of acrylic for the top.

(If someone has a better idea for attaching the acrylic than silicon, let me know. I ran a bead around the edge, and while it works fine, it kinda looks like snot.)
(***Note: My friend Sam recommended stick-on silicon and rubber discs.
I think that would work better!***)
(***Note: My friend Sam recommended stick-on silicon and rubber discs.
I think that would work better!***)
I wanted little curtains, but the cafe curtain rods at Home Depot were too long.
I was pondering what I could use instead, when one of those helpful
Home Depot guys suggested these:


I thumb tacked them to the inside corners, making a notch in one of each pair, and used wooden dowels to make the curtain rods.

(I was ridiculously proud of myself for this idea.)
There was just one more thing to do: sew curtains! I didn't have enough of one fabric for all the curtains, so I decided to go with a quilt-y, scrappy look instead:

Ta-freakin'-da.
And here's the other side.

What's the second-most beautiful part of this project?
My new counter space!

I totally bow down! Beth, this is such a wonderfully creative and thrifty piece. And as for the snot... have you considered the stick on silicon and rubber discs? I used them to keep a glass topper from sliding off my dining table.
ReplyDeleteAh... the stick-on silicon would totally give a more finished look. The stuff I used isn't terribly noticeable, but since the top of the crates aren't completely flush, the sorta-neat line of silicon I used turned into a fat and skinny line once the acrylic was pushed down.
DeleteI'll add your idea to the post!
Very impressive!
ReplyDeleteThanks!
ReplyDelete