Y'know how there's people who have these weird, obscure costumes at Halloween,
and when you ask them what they're dressed as,
they launch into a long, convoluted explanation of every aspect of the outfit?
And you want to say, Can't you just be a sexy kitten, or something?
Yeah, I'm that annoying costume person.
But I don't mean to be irritating!
I just get excited about an idea, then have to run with it.
I adore Parks and Recreation: it's not only funny,
but it's also the most feminist show on TV.
Both those aspects were on display in a season four episode titled "Pawnee Rangers",
in which lead character Leslie Knope (played by Amy Poehler) led a
progressive troop of young girls called the Pawnee Goddesses.
I loved the episode, and I LOVED THE OUTFIT!
So, I decided to make a Pawnee Goddess costume of my own.
The beauty of wearing it to PaleyFest is that I wouldn't have to explain to a single person what I was wearing! We would all have a common frame of reference!
Now, how to make it?
TO THE INTERNETS!!!
First, I found a very helpful tutorial by the lovely and talented Heidi of Hands Occupied.
Thanks, Heidi!
Next, I found a graphic for the all-important Pawnee Goddess patch.
Thanks, Andrea!
After making the vest and buying some pre-made patches,
I set out to make some patches of my own.
Interested in doing the same?
You will need:
white fabric
small scraps of felt
a color printer
Heat N Bond LITE
Heat N Bond ULTRAHOLD
thread
a half-way decent but not necessarily fancy sewing machine
Instructions!
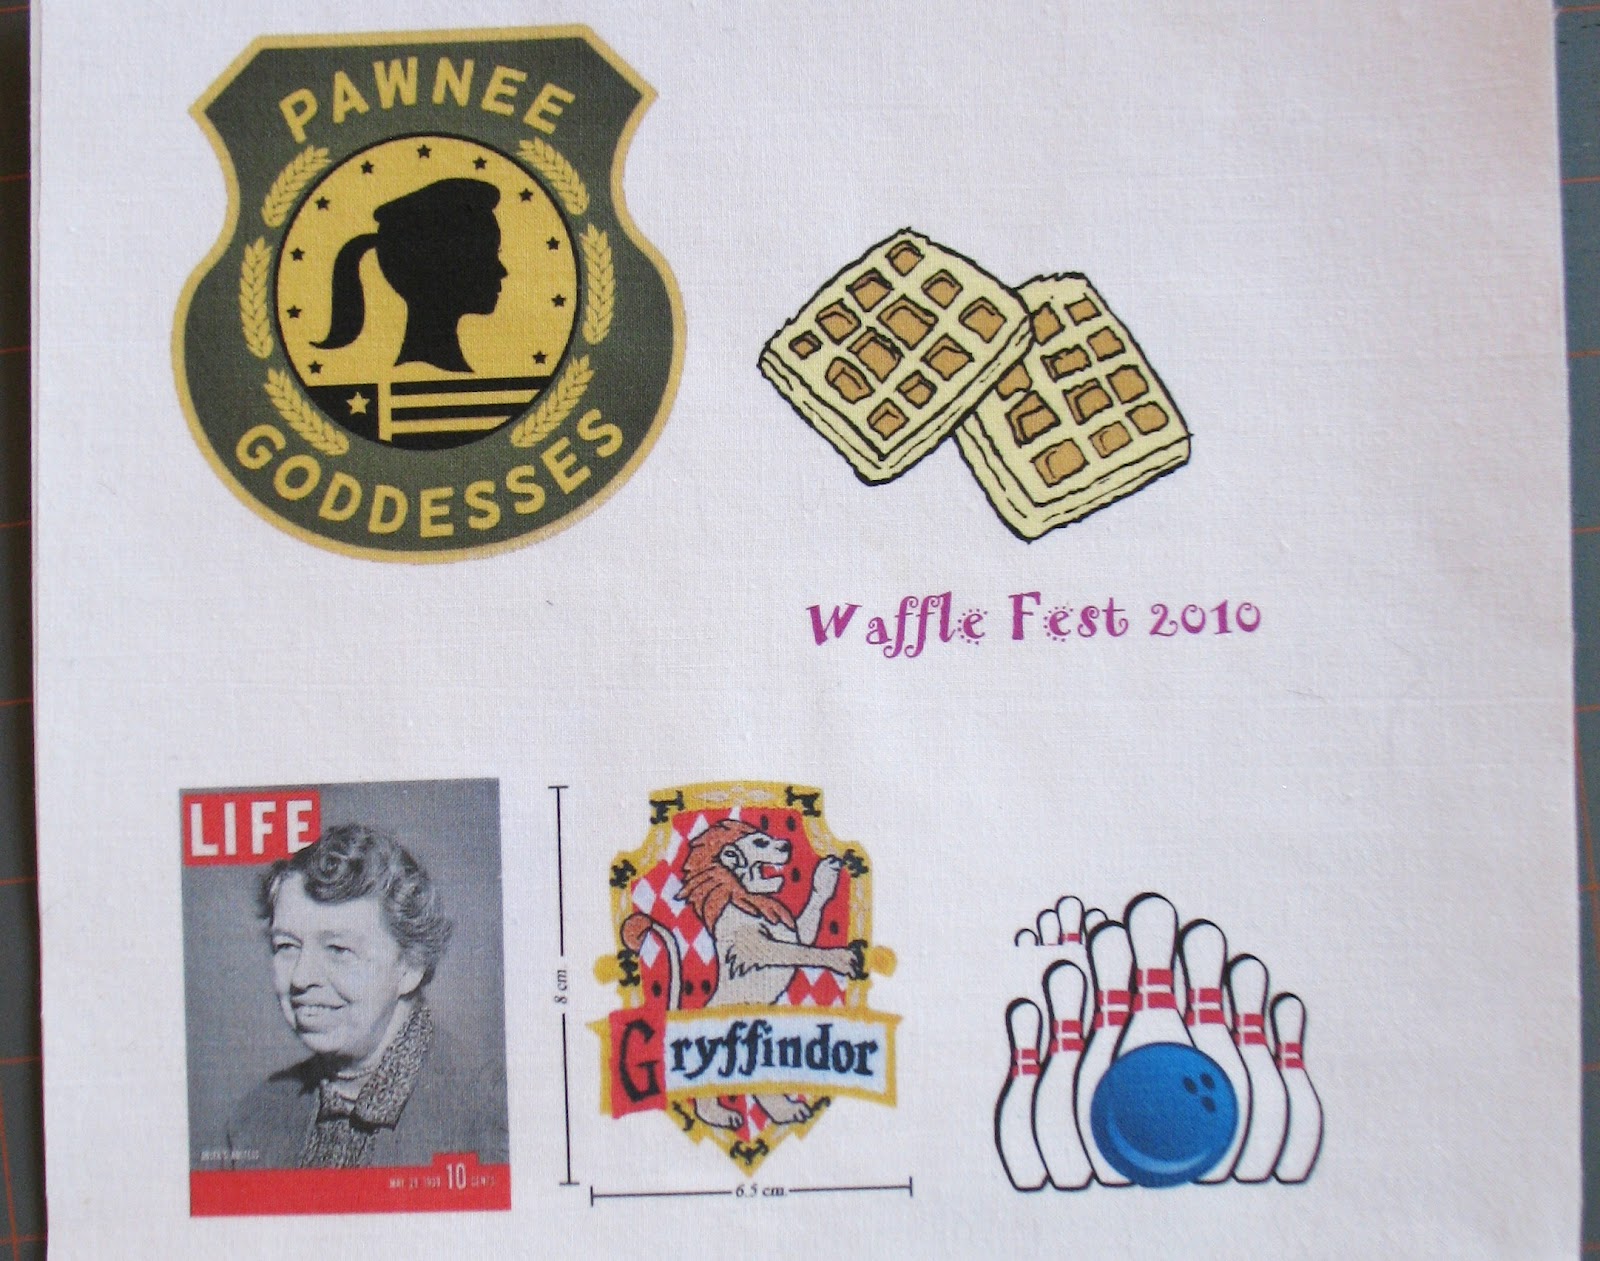
First, I put all my graphics into one page of a Word document.
(You don't have to print them out. This paper is just for a visual.)
Next, I got some Heat N Bond.
I STARTED WITH HEAT N BOND LITE.
I was yelling at you with caps because if you use the UltraHold,
you will not be able to sew through the patches, and You Will Be Sad.
I cut an 8 1/2" by 11" piece of Heat N Bond Lite, and the same size of bright white cotton.
I followed the directions and bonded them together.
Next, I ran this bonded fabric through my printer.
I'll be honest: sometimes this works great; sometimes my printer gets into a snit
and jams a little. I would say that if your printer can handle cardstock,
it should be okay with this bonded fabric.
I cut out the images with about an eighth of an inch white border around the edges.
I peeled off the Heat N Bond backing, and bonded the patches to coordinating felt.
I had a scant eight inches of felt around the edges.
I AM YELLING AGAIN TO SAY THE FELT NEEDS TO MATCH THE COLOR OF THREAD YOU ARE GOING TO USE, SO PLAN AHEAD!
Here they are, all nice and cut out.
My plan was to do a buttonhole stitch (the satin-stitch kind) all around,
covering both the white border and the felt.
I started with the rectangular patch because I thought it would be easier.
MISTAKE.
Those stupid corner were impossible, and the tight, wide buttonhole stitch kept getting caught up in the foot and machine.
So, Eleanor doesn't look great.
For the next patch, I decided to try a zig-zag stitch,
and make it only medium wide ("3" on my machine),
rather than really wide (The "5" on my machine.)
I also went around more than once, to fill in the gaps, and I made sure
to cover both the white border and the felt.
Better!
For the third patch, I really rounded the corners. It made it much easier.
Lookin' good!
I got cocky, and tried an intricate Gryffindor patch.
Oy. Those corners were a pain. I should have found a more rounded image.
Also?
DON'T USE STEAM!
It made the colors run a bit.
Now, it was time for the most important patch of all:
The Pawnee Goddess patch!
I put everything I learned together on this one.
I rounded the corners.
I did a narrow zig-zag for the first time around, then the widest zig-zag after that.
I went around and around until all the white border and felt were covered.
IT'S BEAUTIFUL!
To attach them to the vest, I flipped them over, and used the Heat N Bond UltraHold.
I peeled off the backing, and ironed those suckers to the vest.
The payoff to all my work?
I got to ask this lady a question at the Parks and Recreation panel...
... AND, I was hailed as Queen of the Dorks at the event.
Which was pretty dang cool.
Next up: How to make a Pawnee Ranger outfit!